LM Studio 0.3.4 支持 Apple MLX
LM Studio 0.3.4 配备了 MLX 引擎,可在 Apple Silicon Mac 上高效运行本地 LLM。
从这里下载适用于 Apple Silicon 的 LM Studio。继续阅读以了解更多关于 LM Studio 中的 MLX 信息。
M3 Max 上的 Llama 3.2 1B 运行速度约为每秒 250 个 token
👾 对设计和构建系统感兴趣? 我们正在招聘。查看此处的空缺职位。
LM Studio 0.3.4 中的 MLX 支持包括:
- 从 Hugging Face 搜索并下载任何受支持的 MLX LLM(就像您使用 GGUF 模型一样)
- 通过聊天 UI 或使用在 localhost 上运行的类似 OpenAI 的本地服务器,从您的代码中使用 MLX 模型
- 强制 LLM 以特定 JSON 格式响应(感谢 Outlines)
- 使用 LLaVA 等视觉模型,并通过聊天或 API 使用它们(感谢 mlx-vlm)
- 加载并同时运行多个 LLM。您甚至可以混合和匹配
llama.cpp和 MLX 模型!
这篇博客文章的其余部分将深入探讨 LM Studio 中 MLX 的技术细节。
特别感谢 Awni Hannun (MLX) 和 Rémi Louf (.txt/Outlines) 审阅了这篇博客文章的草稿以及 mlx-engine 代码。
什么是 MLX?
……我为什么要关心它?
MLX 是 Apple 推出的一款新的开源 AI/ML 软件栈,专门为 Apple Silicon 优化。它利用了 Apple M 芯片中强大的加速硬件。
MLX 由 Apple 的工程师开发,并受到不断壮大的开发者社区的支持,有望成为在 Mac 上运行本地 AI 的极具竞争力的选择。
MLX 核心库用 C++ 编写,并配有社区支持的 Python 和 Swift 前端。
我们很高兴在 LM Studio 中推出 MLX 支持。这篇博客文章将涵盖 MLX 的一些通用技术细节,以及 LM Studio 的 MLX 引擎的具体细节。
LM Studio 的 mlx-engine 是开源的
LM Studio 的 MLX 引擎是一个 Python 模块,它结合了以下包构建而成:
- mlx-lm - 由 Awni Hannun 和 Apple 团队开发的 Apple MLX(Python 前端)。
- Outlines - 由 Rémi Louf 和 .txt 团队开发的 LLM 结构化生成。
- mlx-vlm - 由 Prince Canuma 开发的适用于 Apple MLX 的视觉 LLM。
mlx-engine 在 MIT 许可下开源。仓库:https://github.com/lmstudio-ai/mlx-engine。
LM Studio 中的 MLX 使用 Python?!
我们将 MLX 集成到 LM Studio 的旅程始于 Swift。虽然这种方法运行良好,但最终以下设计目标使 Python 成为更好的选择。
设计目标 1: 我们希望与社区一起迭代 MLX 引擎
- 更多开发人员、研究人员熟悉 Python
设计目标 2: 我们希望能够尽快支持最新的模型和技术
- Python 中的 MLX 往往会更快地获得对新模型的支持
将 mlx-lm 支持添加到 LM Studio 需要能够以可移植、跨平台的方式部署和运行 Python 组件。理想情况下,我们还希望能够将这些组件与 LM Studio 主应用程序中已使用的现有 C/C++ 组件完全集成(这最终排除了某些潜在的候选解决方案,例如 conda 环境)。
LM Studio 的初始 Python 运行时支持建立在 python-build-standalone 项目和 Python 虚拟环境之上,使用了一个即将发布的实用程序,该实用程序支持创建一组集成的、可独立下载的 Python 应用程序环境,这些环境共享公共运行时和框架层(毕竟,如果可以合理避免,没有人希望下载和安装多个 PyTorch 或 CUDA 副本)。
这个“堆叠虚拟环境”实用程序使用 CPython 解释器的“站点自定义”功能,以及对虚拟环境内容的发布前和安装后调整,以允许这些虚拟环境在机器之间可靠地传输,并使用 CPython 的 -m 命令行开关调用包含的应用程序启动模块。
请关注 10 月晚些时候关于这方面的更详细技术公告。
迷你深度解析:mlx-engine 的一些功能
使用 MLX 运行文本生成模型
Python MLX 生态系统的一个关键部分是 mlx_lm。这个项目提供了一种使用 CLI 工具或几行 Python 代码运行大型语言模型的简单方法,例如
from mlx_lm.utils import load, generate_step
import mlx.core as mx

def mlx_stream(prompt: str):
    model, tokenizer = load("/path/to/mlx/model")
    prompt_tokens = mx.array(tokenizer.encode(prompt))
    while True:
        yield generate_step(
            model=model,
            prompt=prompt_tokens
        )

for token in mlx_stream(prompt="Hello world!"):
    print(token, end="", flush=True)
让我们打开 generate_step 的盖子,以便我们更好地了解发生了什么
def generate_step(*args, **kwargs):

    # --snip--

    def sample(logits):
        logprobs = logits - mx.logsumexp(logits)
        if temp == 0:
            token = mx.argmax(logits, axis=-1)
        else:
            if top_p > 0 and top_p < 1.0:
                token = top_p_sampling(logits, top_p, temp)
            elif min_p != 0.0:
                token = min_p_sampling(logits, min_p, min_tokens_to_keep, temp)
            else:
                token = categorical_sampling(logits, temp)

        return token, logprobs

    y = prompt
    tokens = None

    def _step(y):
        logits = model(y[None], cache=cache)
        logits = logits[:, -1, :]

        nonlocal tokens
        tokens = mx.concat([tokens, y]) if tokens is not None else y
        for processor in logits_processor:
            logits = processor(tokens, logits)

        y, logprobs = sample(logits)
        return y, logprobs.squeeze(0)

    y, logprobs = _step(y)
    while True:
        next_y, next_logprobs = _step(y)
        yield y.item(), logprobs
        y, logprobs = next_y, next_logprobs
我们可以看到这里发生了重要的操作
- 模型通过其
__call__方法进行评估。这会返回一个 logits 数组,其中每个元素对应于模型词汇表中的一个项。logits 定义了词汇表中各项的概率分布。 - 使用用户提供的采样参数,从 logits 数组中选择(即采样)一个 token。
- 采样到的 token 返回给调用者。
让我们看看如何为这个生成循环添加用户会喜欢的功能。
使用 Outlines 实现结构化生成
让我们为生成器添加一个功能:用户可以请求生成器输出有效的 JSON。我们可以使用 Outlines(来自 .txt)来实现此功能。
Outlines 能够从 LLM 生成结构化输出(例如创建 JSON 输出)。此包支持 mlx_lm 运行时,我们将利用这一点。Outlines 通过将用户提供的 JSON 模式转换为正则表达式来实现其功能。请看这个标题模式。
{
  "type": "object",
  "properties": {
    "title": {
      "type": "string",
      "minLength": 1
    }
  },
  "required": [
    "title"
  ]
}
Outlines 将该模式转换为此正则表达式字符串
\{[ ]?"title"[ ]?:[ ]?"([^"\\\x00-\x1F\x7F-\x9F]|\\["\\]){1,}"[ ]?\}
这是一个更易读(但不太精确)的正则表达式字符串版本:\{"title": ".{1,}"\}
使用此正则表达式字符串,Outlines 的生成循环如下:
- 评估模型。即处理提示并为每个标记输出 logits。
- 对于每个 token,评估采样它是否会违反正则表达式。如果违反,我们将其概率设置为零。我们称之为掩码 logits。
- 使用被掩码的 logits 采样一个 token。
mlx_lm 的 generate_step 允许我们定义 logits 处理器,因此让我们定义一个处理器来掩码 logits,以便输出匹配正则表达式
from outlines.processors.structured import JSONLogitsProcessor

class OutlinesJSONLogitsProcessor:
    def __init__(self, json_schema, tokenizer):
        self.logits_processor = JSONLogitsProcessor(json_schema, tokenizer)

    def __call__(self, tokens: mx.array, logits: mx.array):
        logits_1d = logits.flatten()  # convert to 1-dimensional array
        logits_1d = self.logits_processor(tokens, logits_1d)
        logits = logits_1d[None]  # convert back to original shape
        return logits
我们可以通过实例化这个对象来调用 mlx 生成步骤
def mlx_stream(prompt: str):
    model, tokenizer = load("/path/to/mlx/model")
    prompt_tokens = mx.array(tokenizer.encode(prompt))
    json_schema='''{"type":"object","properties":{"title":{"type":"string","minLength":1}},"required":["title"]}'''  # define schema
    while True:
        yield generate_step(
            model=model,
            prompt=prompt_tokens,
            logits_processor=[OutlinesJSONLogitsProcessor(json_schema, tokenizer)]  # output valid json
        )
就是这样!现在,只要提供了 JSON 模式,我们就可以生成 JSON。
使用 MLX 运行视觉模型
MLX python 生态系统的另一个部分是 mlx_vlm,它是一个运行视觉 LLM 的包。以下是 mlx_vlm 中的 generate_step 方法,为简洁起见进行了编辑
def generate_step(*args, **kwargs):
    def sample(logits: mx.array) → Tuple[mx.array, float]:
        if temp == 0:
            token = mx.argmax(logits, axis=-1)
        else:
            if top_p > 0 and top_p < 1.0:
                token = top_p_sampling(logits, top_p, temp)
            else:
                token = mx.random.categorical(logits * (1 / temp))
        return token, logprobs

    # --snip--

    def _step(y):
        logits = model.language_model(y[None], cache=cache, mask=mask)
        logits = logits[:, -1, :]
        y, logprobs = sample(logits)
        return y, logprobs.squeeze(0)

    y = prompt
    logits = model(y, pixel_values, cache=cache, mask=mask)
    logits = logits[:, -1, :]
    y, logprobs = sample(logits)
    while True:
        next_y, next_logprobs = _step(y)
        yield y.item(), logprobs
        y, logprobs = next_y, next_logprobs
让我们比较和对比一下 mlx_vlm 实现与 mlx_lm 实现
mlx_vlm评估使用model.__call__方法。第一次评估处理像素数据,后续评估使用底层语言模型。mlx_vlm中的sample函数可用的采样方法比mlx_lm少。mlx_vlm中没有 logits_processor。
结合使用 mlx_lm 的 logits 处理和采样,同时使用 mlx_vlm 的视觉模型将很有益处。让我们来实现它!
我们将编写一个类,它将在首次调用时评估像素数据,并在后续调用时使用语言模型
class VisionModelWrapper:
    def __init__(self, vision_model, image_processor, pixel_values, mask):
        self.vision_model = vision_model
        self.image_processor = image_processor
        self.pixel_values = pixel_values
        self.mask = mask
        self.first_call = False

    def __call__(self, *args, **kwargs):
        if self.pixel_values is not None and not self.first_call:
            self.first_call = True
            return self.vision_model(self.input_ids, self.pixel_values, self.mask, **kwargs)
        else:
            return self.vision_model.language_model(*args, mask=self.mask, **kwargs)
现在,我们可以将它传递给 mlx_lm.generate_step
def mlx_stream(prompt: str):
    # load and wrap the vision model
    vision_model_dict, tokenizer = load_vision_model("/path/to/mlx/vision_model", "/path/to/image")
    vision_model_wrapper = VisionModelWrapper(**vision_model_dict)

    prompt_tokens = mx.array(tokenizer.encode(prompt))
    json_schema='''{"type":"object","properties":{"title":{"type":"string","minLength":1}},"required":["title"]}'''
    while True:
        yield generate_step(
            model=vision_model_wrapper,
            prompt=prompt_tokens,
            logits_processor=[OutlinesJSONLogitsProcessor(json_schema, tokenizer)]
        )
现在我们可以用一张图片提示一个 LLM,让它为我们制作一个标题!
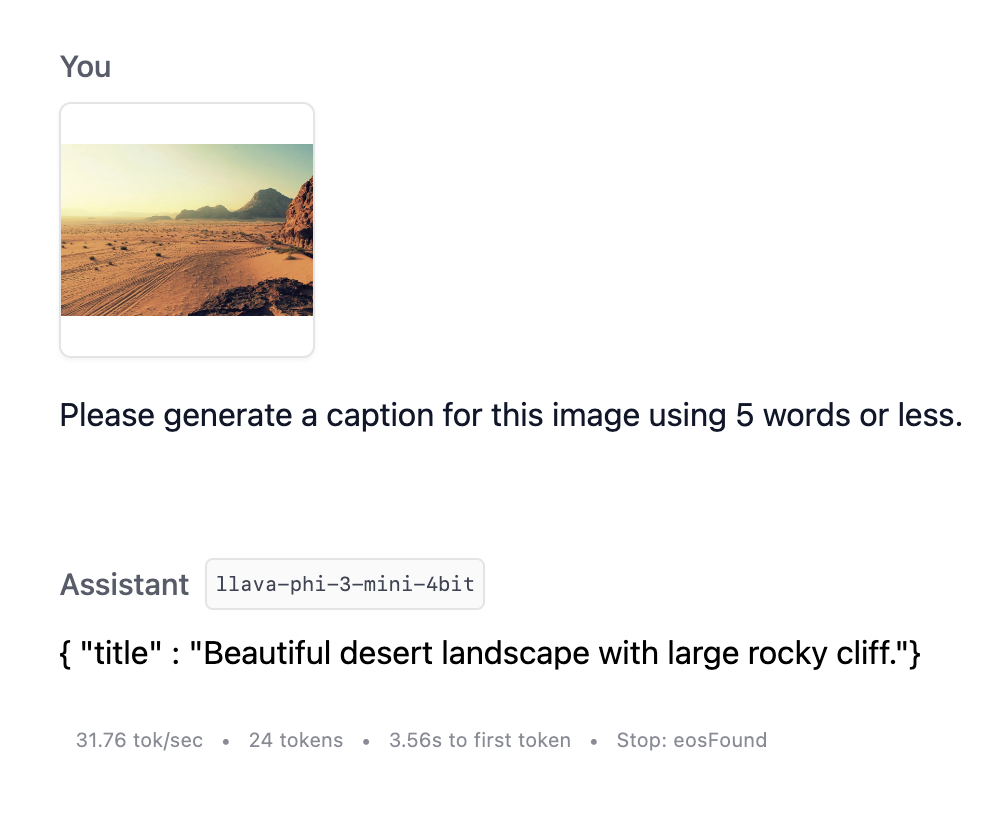
使用 VLM 和结构化输出为图像添加说明
跨提示的 KV 缓存
跨提示的 KV(键值)缓存是一种优化技术,它使 LLM 引擎能够重用先前交互中的计算。这可以极大地提高模型的响应时间,或“首个 Token 的时间”。
在聊天场景中,KV 缓存尤其有价值,因为提示的大部分(聊天历史记录)在模型生成请求中通常是相同的。
示例
时间步 1 (T1) - 用户发送提示 "总结这篇长文章:<此处是长文章...>"
{
    "User" : "Summarize this long article: <long article here...>"
}
时间步 2 (T2) - LLM 引擎对输入进行推理,计算模型权重和输入 token 嵌入之间的大型矩阵乘法以生成输出 token:"本文讨论了...的影响"
{
    "User" : "Summarize this long article: <long article here...>",
    "AI" : "This article discusses the impact of..."
}
时间步 3 (T3) - 用户发送提示 "文章中提到任何人了吗?"。整个聊天历史记录被发送到 LLM,以便为其提供适当的上下文来继续对话。
{
    "User" : "Summarize this long article: <long article here...>",
    "AI" : "This article discusses the impact of...",
    "User" : "Are there any people mentioned in the article?"
}
时间步 4 (T4) - LLM 引擎对输入(T1、T2 和 T3 中的所有 token)执行推理,计算模型权重和输入 token 嵌入之间的大型矩阵乘法以生成输出 token:"是的,文章提到了几个关键人物,包括..."
{
    "User" : "Summarize this long article: <long article here...>",
    "AI" : "This article discusses the impact of...",
    "User" : "Are there any people mentioned in the article?",
    "AI" : "Yes, the article mentions several key figures, including..."
}
KV 缓存
KV 缓存利用了一个事实,即当我们在 T3 询问 LLM "文章中提到的人" 时,我们已经在 T1 和 T2 中执行了与 T3 中需要计算的相同的矩阵计算
{
    # START OF PREVIOUSLY COMPUTED
    "User" : "Summarize this long article: <long article here...>",
    "AI" : "This article discusses the impact of..."
    # END OF PREVIOUSLY COMPUTED
    "User" : "Are there any people mentioned in the article?"
}
因此,如果我们将在 T1 和 T2 中的计算结果保存到 KV CACHE 中,并在 T3 时让引擎访问 KV CACHE,那么引擎只需对提示的新部分 "文章中提到任何人了吗?" 执行计算
{
    KV CACHE,
    "User" : "Are there any people mentioned in the article?"
}
这可以大大提高 T4 的响应时间。在我们的测试中,对于一篇大约 3000 个 token 的文章和 Meta-Llama-3.1-8B-Instruct-4bit,T4 的响应时间从不使用 KV 缓存时的约 10 秒下降到使用 KV 缓存后的仅 0.11 秒。
我们当前的 MLX KV 缓存实现
在实现时,mlx-lm 在其 generate_step 函数中公开了一个 cache_history 参数
def generate_step(
    *args,
    cache_history: Optional[List[Tuple[mx.array, mx.array]]] = None,
    **kwargs
) → Generator[Tuple[mx.array, mx.array], None, None]:
通过传递正确的 cache_history(类似于上面的 KV CACHE),我们得以在 MLX 引擎中实现 KV 缓存的初始版本。
我们通过修改 mlx-lm 的 PR 增加从文件加载 KV 缓存的能力 来实现这一点,在该 PR 中,我们在缓存包装器中通过模型预处理提示
    def process_prompt(self, prompt_tokens, cache_wrapper, generate_args) → mx.array:
        """
        This method processes the prompt and adds its tokens to the cache history
        """

        # --snip--

        # prefill cache with prompt_tokens, except those that need to have a repetition penalty applied
        # (repetition penalty not currently possible for cached tokens)
        if "repetition_context_size" not in generate_args:
            generate_args["repetition_context_size"] = (
                20  # default value for mlx_lm.utils.generate_step
            )
        repetition_context_size = generate_args["repetition_context_size"]

        cache_history, generate_step_input = cache_wrapper.update_cache(
            prompt_tokens,
            num_tokens_to_exclude=repetition_context_size
        )

        generate_args["cache_history"] = cache_history

        return generate_step_input
上面所示的 cache_wrapper.update_cache 借鉴了 cache_prompt.py 来逐块填充缓存
    # adapted from https://github.com/ml-explore/mlx-examples/blob/324184d670ec11916a5e92314171d497b312eefe/llms/mlx_lm/cache_prompt.py#L121-L137
    step_size = 512
    processed: int = 0
    while processed < len(tokens_to_process):
        # Here we evaluate the input prompt chunk by chunk to fill the cache
        chunk: mx.array = tokens_to_process[processed:processed+step_size]
        self.model(chunk[None], cache=self.cache)
        mx.eval([c.state for c in self.cache])
        self.tokens: mx.array = mx.concatenate([self.tokens, chunk]) if self.tokens is not None else chunk
        processed += chunk.size
现在缓存已经创建并保存到 generate_args["cache_history"] 中,我们可以简单地将 generate_args 和 generate_step_input 传递给 mlx_lm.utils.generate_step
    # `process_prompt` function from above
    generate_step_input = process_prompt(prompt_tokens, cache_wrapper, generate_args)

    max_tokens = generate_args.pop("max_tokens")

    for (token, _), n in zip(
        # generate_step_input is now just the uncached repetition penalty tokens
        # generate_args has "cache_history" member, set in `process_prompt`
        mlx_lm.utils.generate_step(generate_step_input, model, **generate_args),
        range(max_tokens),
    ):
这使得 generate_step 函数能够利用存储在 cache_history 中的先前计算,与对整个提示进行原始处理相比,大大缩短了响应时间。
然后,我们可以在跨提示处理调用中存储此 cache_history 对象,并在此基础上构建,以使聊天场景即使在非常长的对话中也能保持响应。然而,关键是要确保处理到 cache_history 中的 token 在这样做时仍然与提示中的起始 token 相对应。有关更多信息,请查看 update_cache 函数中的缓存重置行为。
LM Studio 0.3.4 的其他新功能
新增
- 任务控制中心:
Cmd+Shift+M搜索模型,Cmd+Shift+R管理 LM 运行时 - 从 UI 设置结构化输出 (JSON Schema)
错误修复
- 修复长时间使用后黑屏问题(参考:lmstudio-bug-tracker#98)
- 修复本地服务器除 1234 端口外无法工作的问题(参考:lms#80)
- 修复 Obsidian 无法使用嵌入 API 的问题(参考:tracker#142)
- 修复 RAG 在文档处理过程中有时会失败的问题
更多
- 下载适用于 macOS、Windows 或 Linux 的最新 LM Studio 应用程序。
- LM Studio 新用户?请访问文档:文档:LM Studio 入门。
- 如需讨论和社区支持,请加入我们的 Discord 服务器。
- 如果您想在工作场所使用 LM Studio,请联系我们:LM Studio @ Work